Disclaimer: This page contains affiliate links and as an Amazon Associate, I earn commissions from qualifying purchases.
***PATTERN UPDATED ON 6/18/2026***
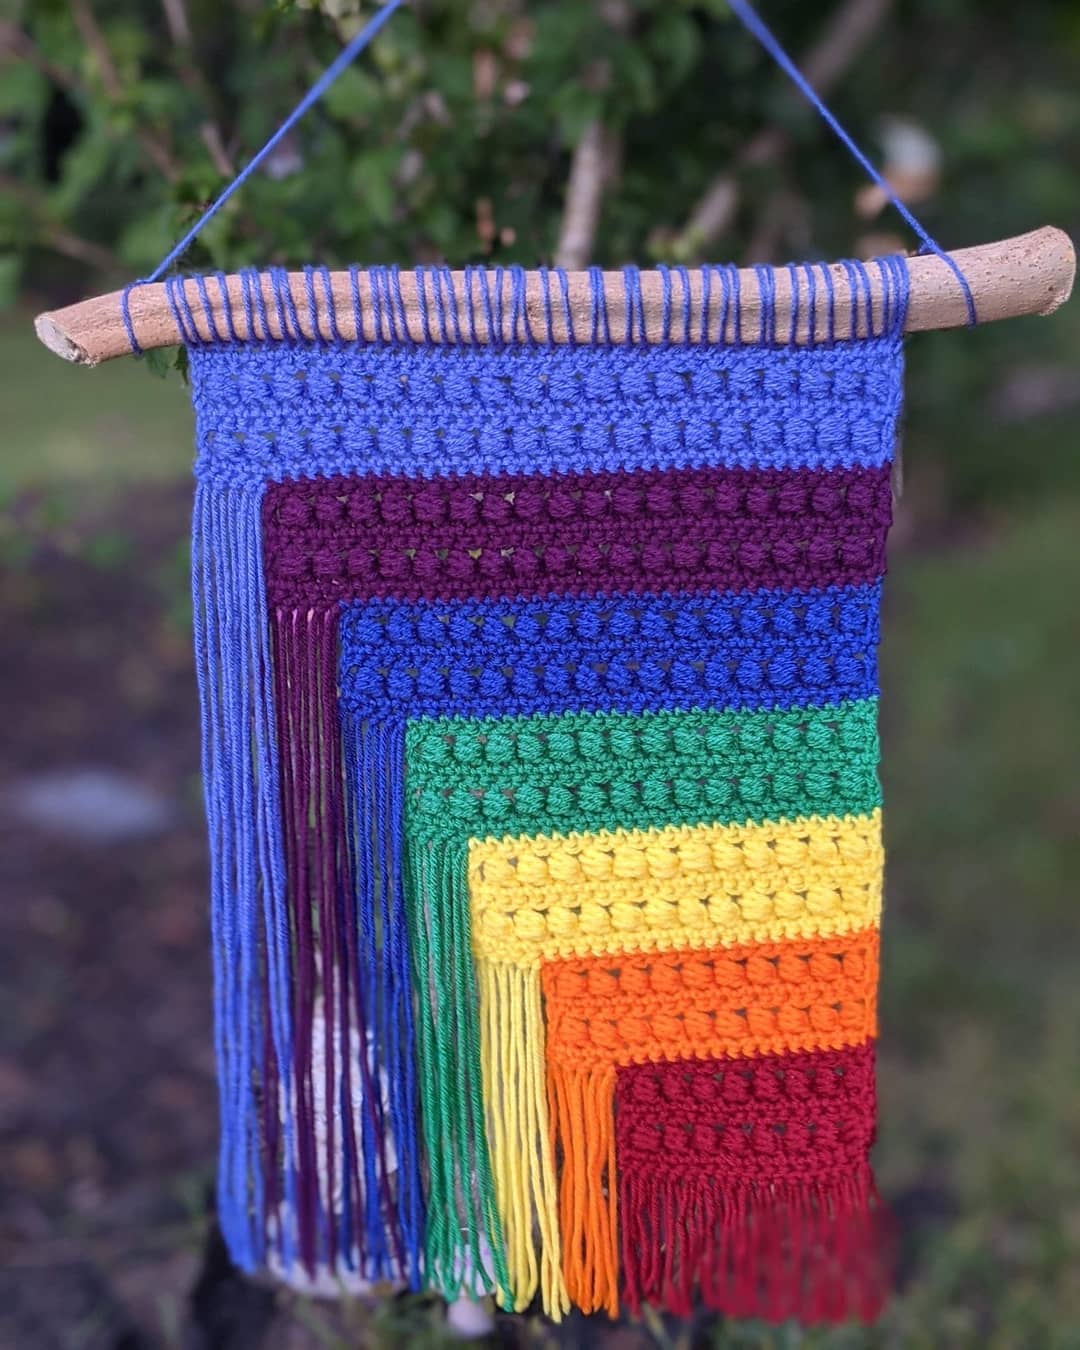
I am so excited to have this pattern finally published!!! This pattern literally came to me while I was meditating, and I couldn’t wait to share it with you! It would be a great addition to your home or yoga studio. The Chakra Wall Hanging would look great in rainbow themed room, or even as a Pride flag!
Another amazing thing about this pattern is that it’s a great stash buster! Don’t have rainbow/chakra colors?….use any colors you’d like! Make the pattern your own! I can’t wait to see what you come up with!
You can find the ad-free PDF Version of this pattern on Ravelry.
MATERIALS
- Any Worsted Weight #4 yarn- Color A (Violet), Color B (Indigo), Color C (Blue), Color D (Green), Color E (Yellow), Color F (Orange), Color G (Red)
- Hook US I / 5.50 mm
- Scissors
- Yarn Needle
- Tape measure
- Wood or rod to attach finished crochet project (I used an 18 inch piece of wood)
GAUGE (not crucial)
- A section of 1 color (5 rows) is 2 inches in height.
- 4 Bead stitches are around 2 inches wide.
SIZE
- Finished size of crochet piece is 12 inches wide by 17 inches long.
EXPERIENCE LEVEL
- Intermediate
PATTERN KEY
- ch: chain, sc: single crochet, dc: double crochet, sl st(s): slip stitch(es)
SPECIAL STITCHES & TECHNIQUES
- Bead Stitch: *yarn over, insert the hook behind the previous double crochet from front to back, yarn over and pull up a loop* Repeat from * to * 2 more times (3 times total = 7 loops on the hook). Yarn over and pull through 6 loops, yarn over and pull through remaining loops on the hook.
NOTES
- Beginning chain 1 DOES NOT count as a stitch.
- Beginning chain 3 DOES count as a stitch.
- The double crochet acts as the backbone for the bead stitch.
- If you prefer rainbow colors, complete the pattern with the colors in reverse.
INSTRUCTIONS
(Color A)
Ch 43
Row 1 (WS): Sc into 2nd ch from hook, sc in each ch across. [42 sc]
Row 2 (RS): Ch 3, turn. Dc in next st, work a bead stitch around the dc you just made, skip 1 st. [dc, work a bead stitch around the dc, skip 1 st] 19 times. Dc in last st. [20 bead stitches, 2 dc]
Row 3: Ch 1, turn, sc in same st, sc in next 41 sts. [42 sc]
Rows 4 and 5: Repeat rows 2 and 3.
Fasten off, leaving a 15-inch-long tail for fringe.
(Color B)
With wrong side facing you, attach new color to first sc of the previous row.
Row 6: Ch 1, turn, sc in same st, sc in next 37 sts. [38 sc]
Row 7: Ch 3, turn, dc in next st, work a bead stitch around the dc you just made, skip 1 st, [dc, work a bead stitch around the dc, skip 1 st] 17 times, dc in last st. [18 bead stitches, 2 dc]
Rows 8 and 9: Repeat rows 6 and 7.
Row 10: Ch 1, turn, sc in same st, sc in next 37 sts. [38 sc]
Fasten off leaving a 13-inch-long tail.
(Color C)
With wrong side facing you, attach new
color to first sc of the previous row.
Row 11: Ch 1, sc in same st, sc in next 33 sts. [34 sc]
Row 12: Ch 3, turn, dc in next st, work a bead stitch around the dc you just
made, skip 1 st, [dc, work a bead stitch
around the dc, skip 1 st] 15 times, dc in
last st. [16 bead stitches, 2 dc]
Rows 13 and 14: Repeat rows 11 and 12.
Row 15: Ch 1, sc in same st, sc in next 33 sts. [34 sc]
Fasten off, leaving an 11-inch-long tail for fringe.
(Color D)
With wrong side facing you, attach new
color to first sc of the previous row.
Row 16: Ch 1, sc in same st, sc in next 29 sts. [30 sc]
Row 17: Ch 3, turn, dc in next st, work a bead stitch around the dc you just
made, skip 1 st, [dc, work a bead stitch
around the dc, skip 1 st] 13 times, dc in
last st. [14 bead stitches, 2 dc]
Rows 18 and 19: Repeat rows 16 and 17.
Row 20: Ch 1, sc in same st, sc in next 29 sts. [30 sc]
Fasten off, leaving an 9-inch-long tail for fringe.
(Color E)
With wrong side facing you, attach new
color to first sc of the previous row.
Row 21: Ch 1, sc in same st, sc in next 25 sts. [26 sc]
Row 22: Ch 3, turn, dc in next st, work a bead stitch around the dc you just made, skip 1 st, [dc, work a bead stitch
around the dc, skip 1 st] 11 times, dc in
last st. [12 bead stitches, 2 dc]
Rows 23 and 24: Repeat rows 21 and 22.
Row 25: Ch 1, sc in same st, sc in next 25 sts. [26 sc]
Fasten off, leaving a 7-inch-long tail for fringe.
(Color F)
With wrong side facing you, attach new
color to first sc of the previous row.
Row 26: Ch 1, sc in same st, sc in next 21 sts. [22 sc]
Row 27: Ch 3, turn, dc in next st, work a bead stitch around the dc you just
made, skip 1 st, [dc, work a bead stitch
around the dc, skip 1 st] 9 times, dc in
last st. [10 bead stitches, 2 dc]
Rows 28 and 29: Repeat rows 26 and 27.
Row 30: Ch 1, turn, sc in same st, sc in next 21 sts. [22 sc]
Fasten off, leaving a 5-inch-long tail for fringe.
(Color G)
With wrong side facing you, attach new
color to first sc of the previous row.
Row 31: Ch 1, sc in same st, sc in next 17 sts. [18 sc]
Row 32: Ch 3, turn, dc in next st, work a bead stitch around the dc you just
made, skip 1 st, [dc, work a bead stitch
around the dc, skip 1 st] 7 times, dc in
last st. [8 bead stitches, 2 dc]
Rows 33 and 34: Repeat rows 31 and 32.
Row 35: Ch 1, sc in same st, sc in next 17 sts. [18 sc]
Fasten off, leaving a 3-inch-long tail for fringe.
Fringe
Cut 5 pieces of each color in the following measurements.
- Color A-30 inches
- Color B-26 inches
- Color C-22 inches
- Color D-18 inches
- Color E-14 inches
- Color F-10 inches
Cut 17 strand of Color G measuring 6 inches
Add fringe one strand at a time, by folding the strand in half and adding them across the remaining single crochets that we didn’t work in, and 1 into the corner of the sc with the next color starting. (see images 1-3)
*When adding the fringe to the single crochet with the tail, bring the tail through the loop that you make for the fringe to go through along with the fringe ends. There should be 3 strands hanging from that fringe. (see image 4)
Weave in remaining ends.
Mounting to the Wood
Using a yarn needle, stitch the top of the wall hanging around a stick of your choice. Fasten off at both ends.
Tie a long piece of yarn to the ends of the stick to use for hanging on the wall.
Image 1
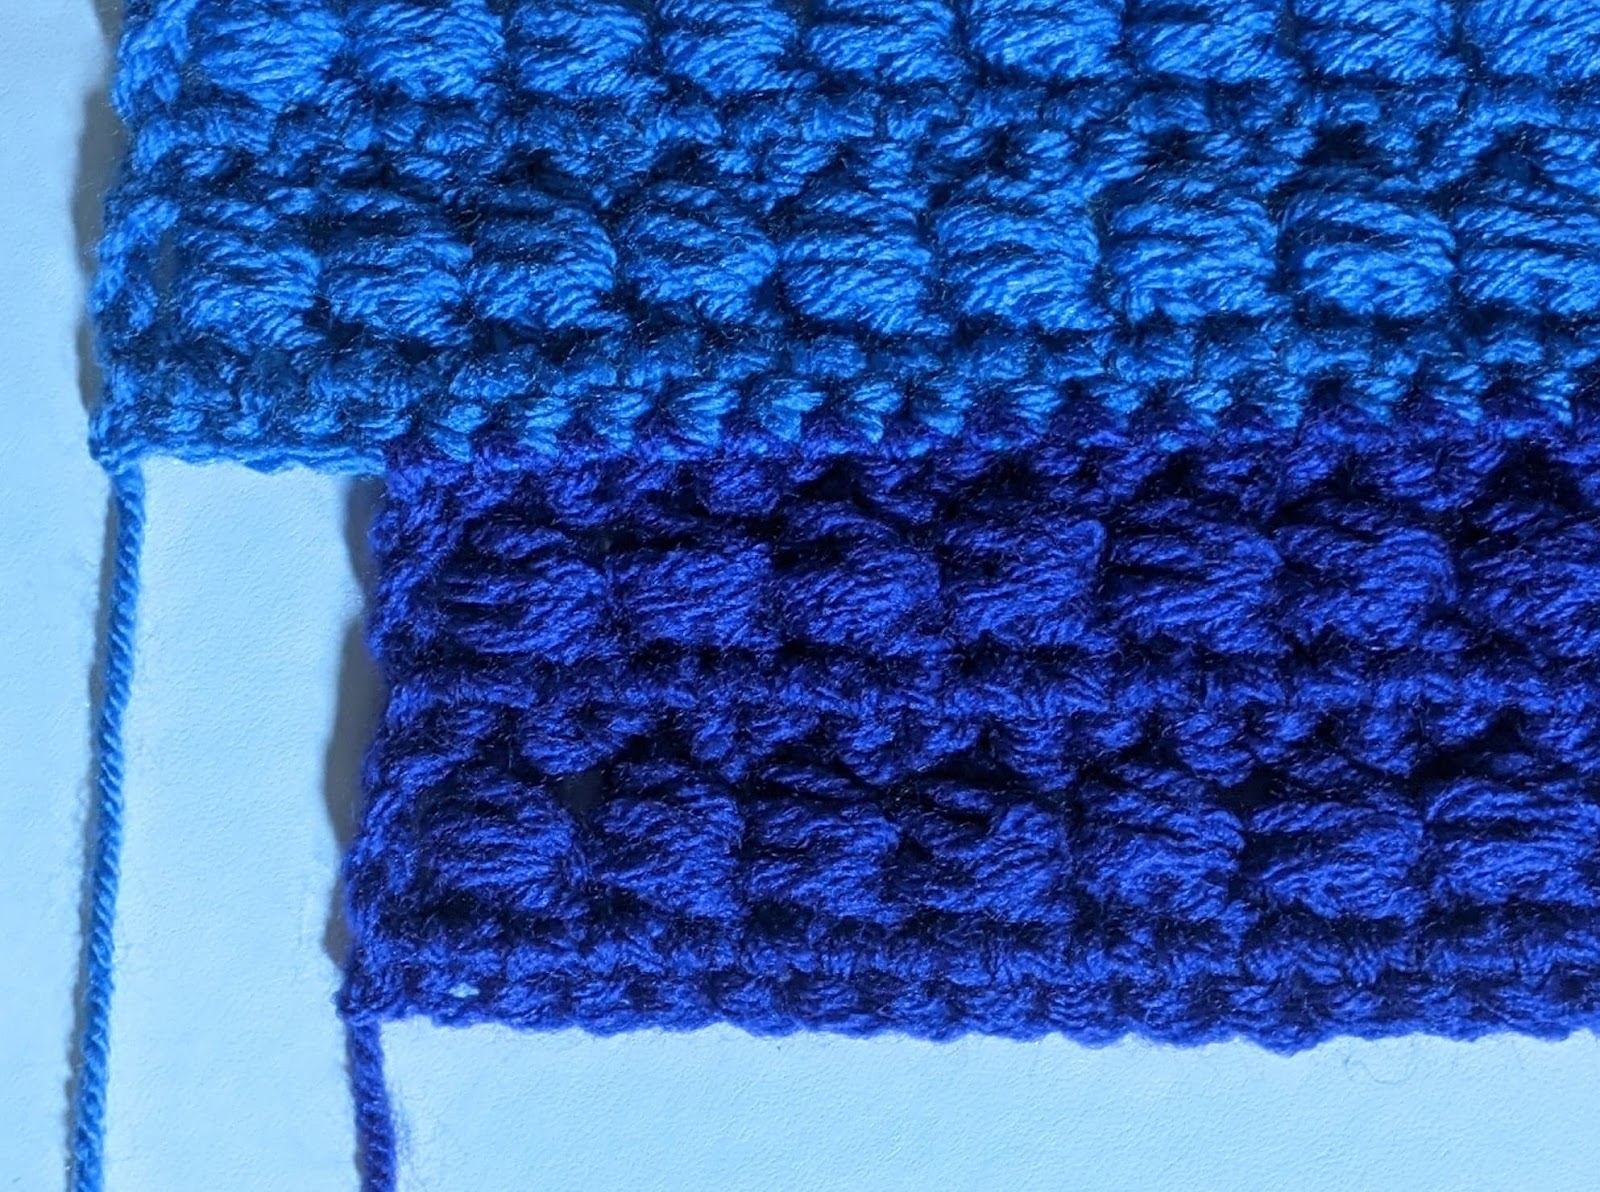
Image 2
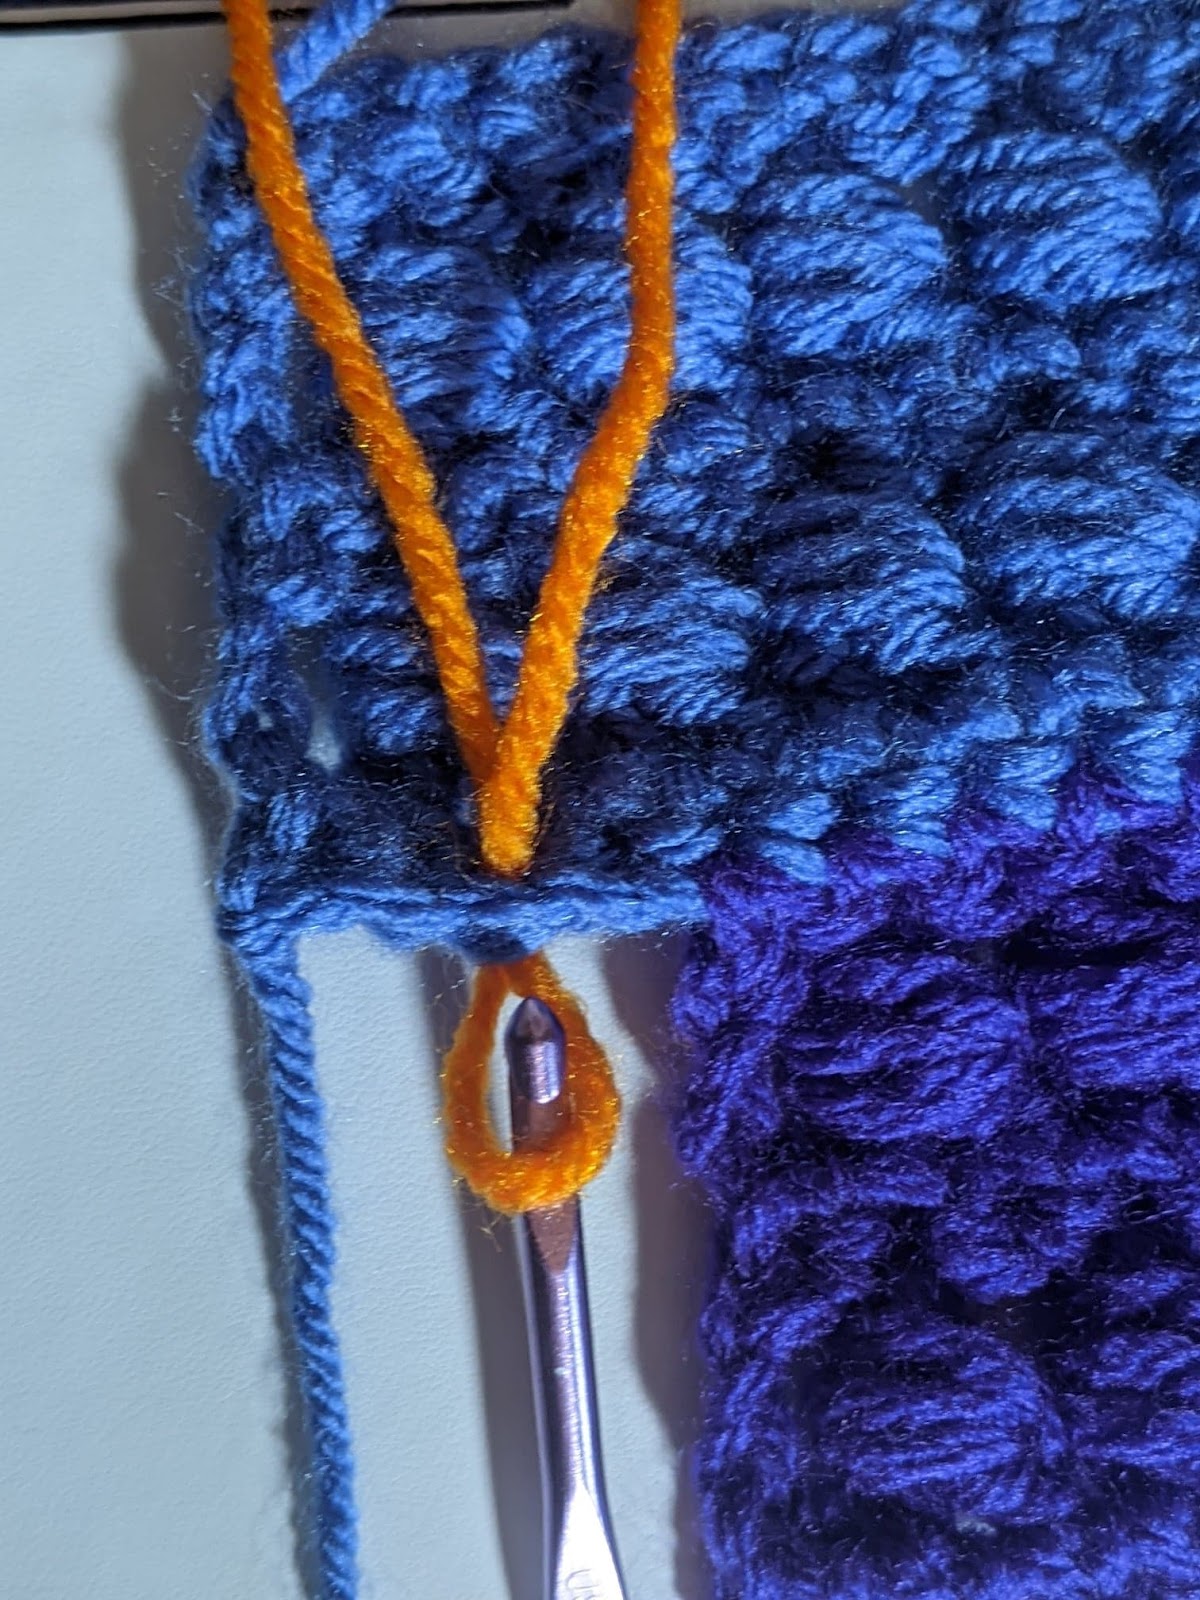
Image 3

Image 4

I can’t wait to see your finished projects! You can add them to Ravelry, and I’d love to be tagged on social media @LeapingLoops so that I don’t miss them there too!
💜Rachel