Disclaimer: This page contains affiliate links and as an Amazon Associate, I earn commissions from qualifying purchases.
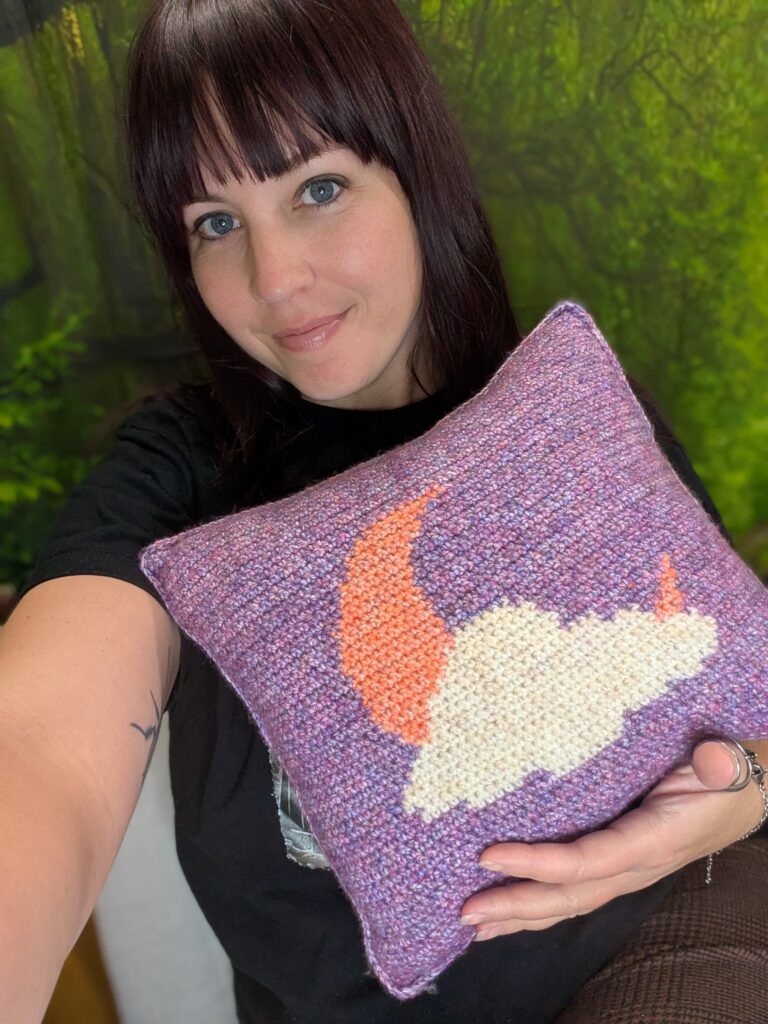
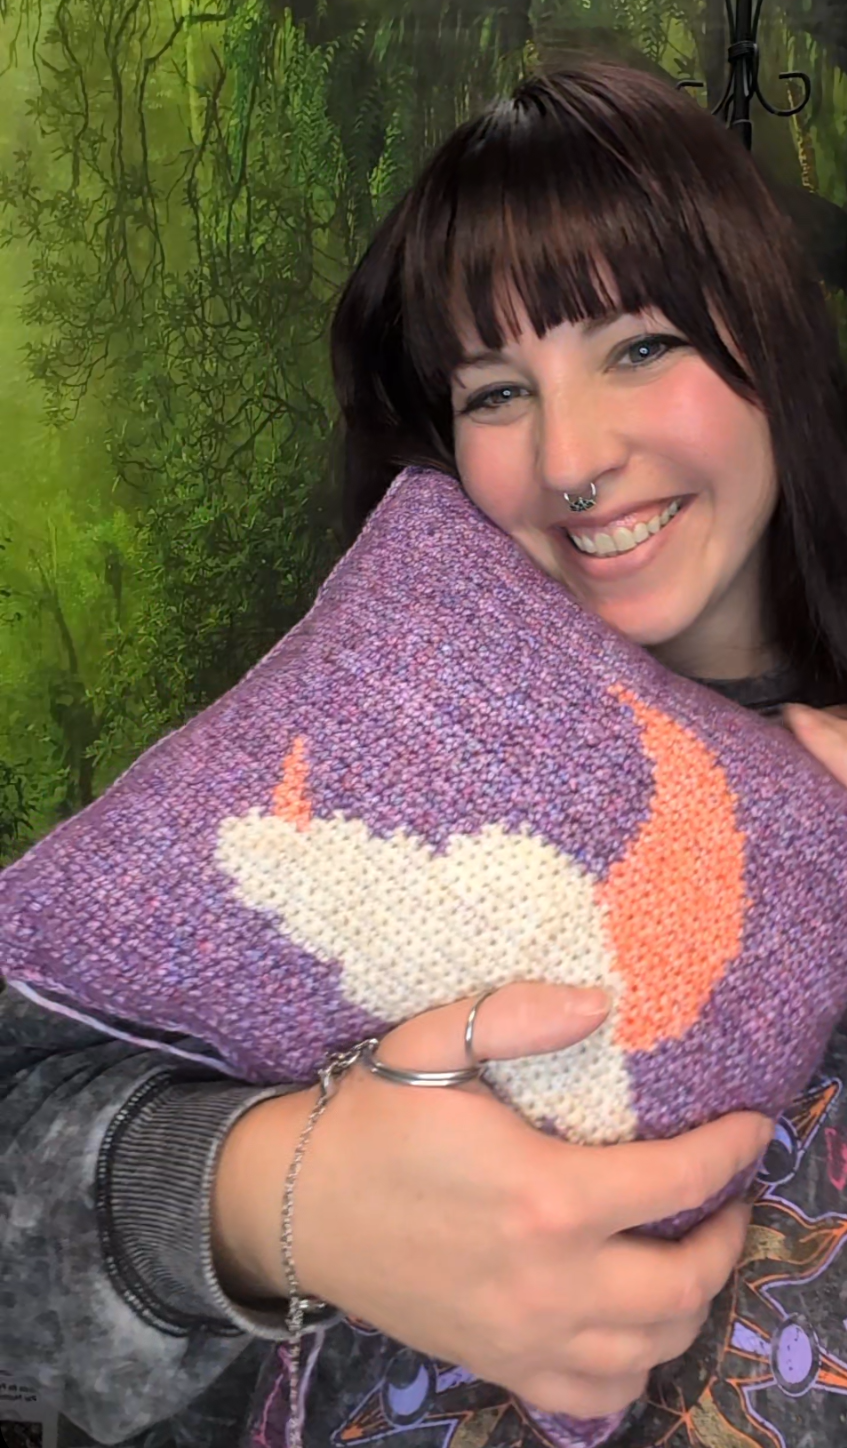
For this free version, you will find the color chart for the front panel of the pillow and the written pattern for the back panel. I’m very excited for the paid PDF version of this pattern, because I included many pattern options for the front panel of the pillow. I wanted this pattern to be accessible to as many people as possible, so I added a color chart, a symbol chart, written instructions with blocks, and written instructions with just words to the paid version
You can find the more extensive version of this pattern on Ravelry and Etsy.
Ravelry: https://ravel.me/hazy-moon-pillow
Since this pillow is filled with Poly-fil stuffing, the finished size is not crucial. If you want to use a different weight of yarn, that is completely fine. I recommend using a crochet hook that is a few sizes down than what is recommended on the label to ensure your stitches are tight. Feel free to use a pillow insert if you don’t want to use Poly-fil.
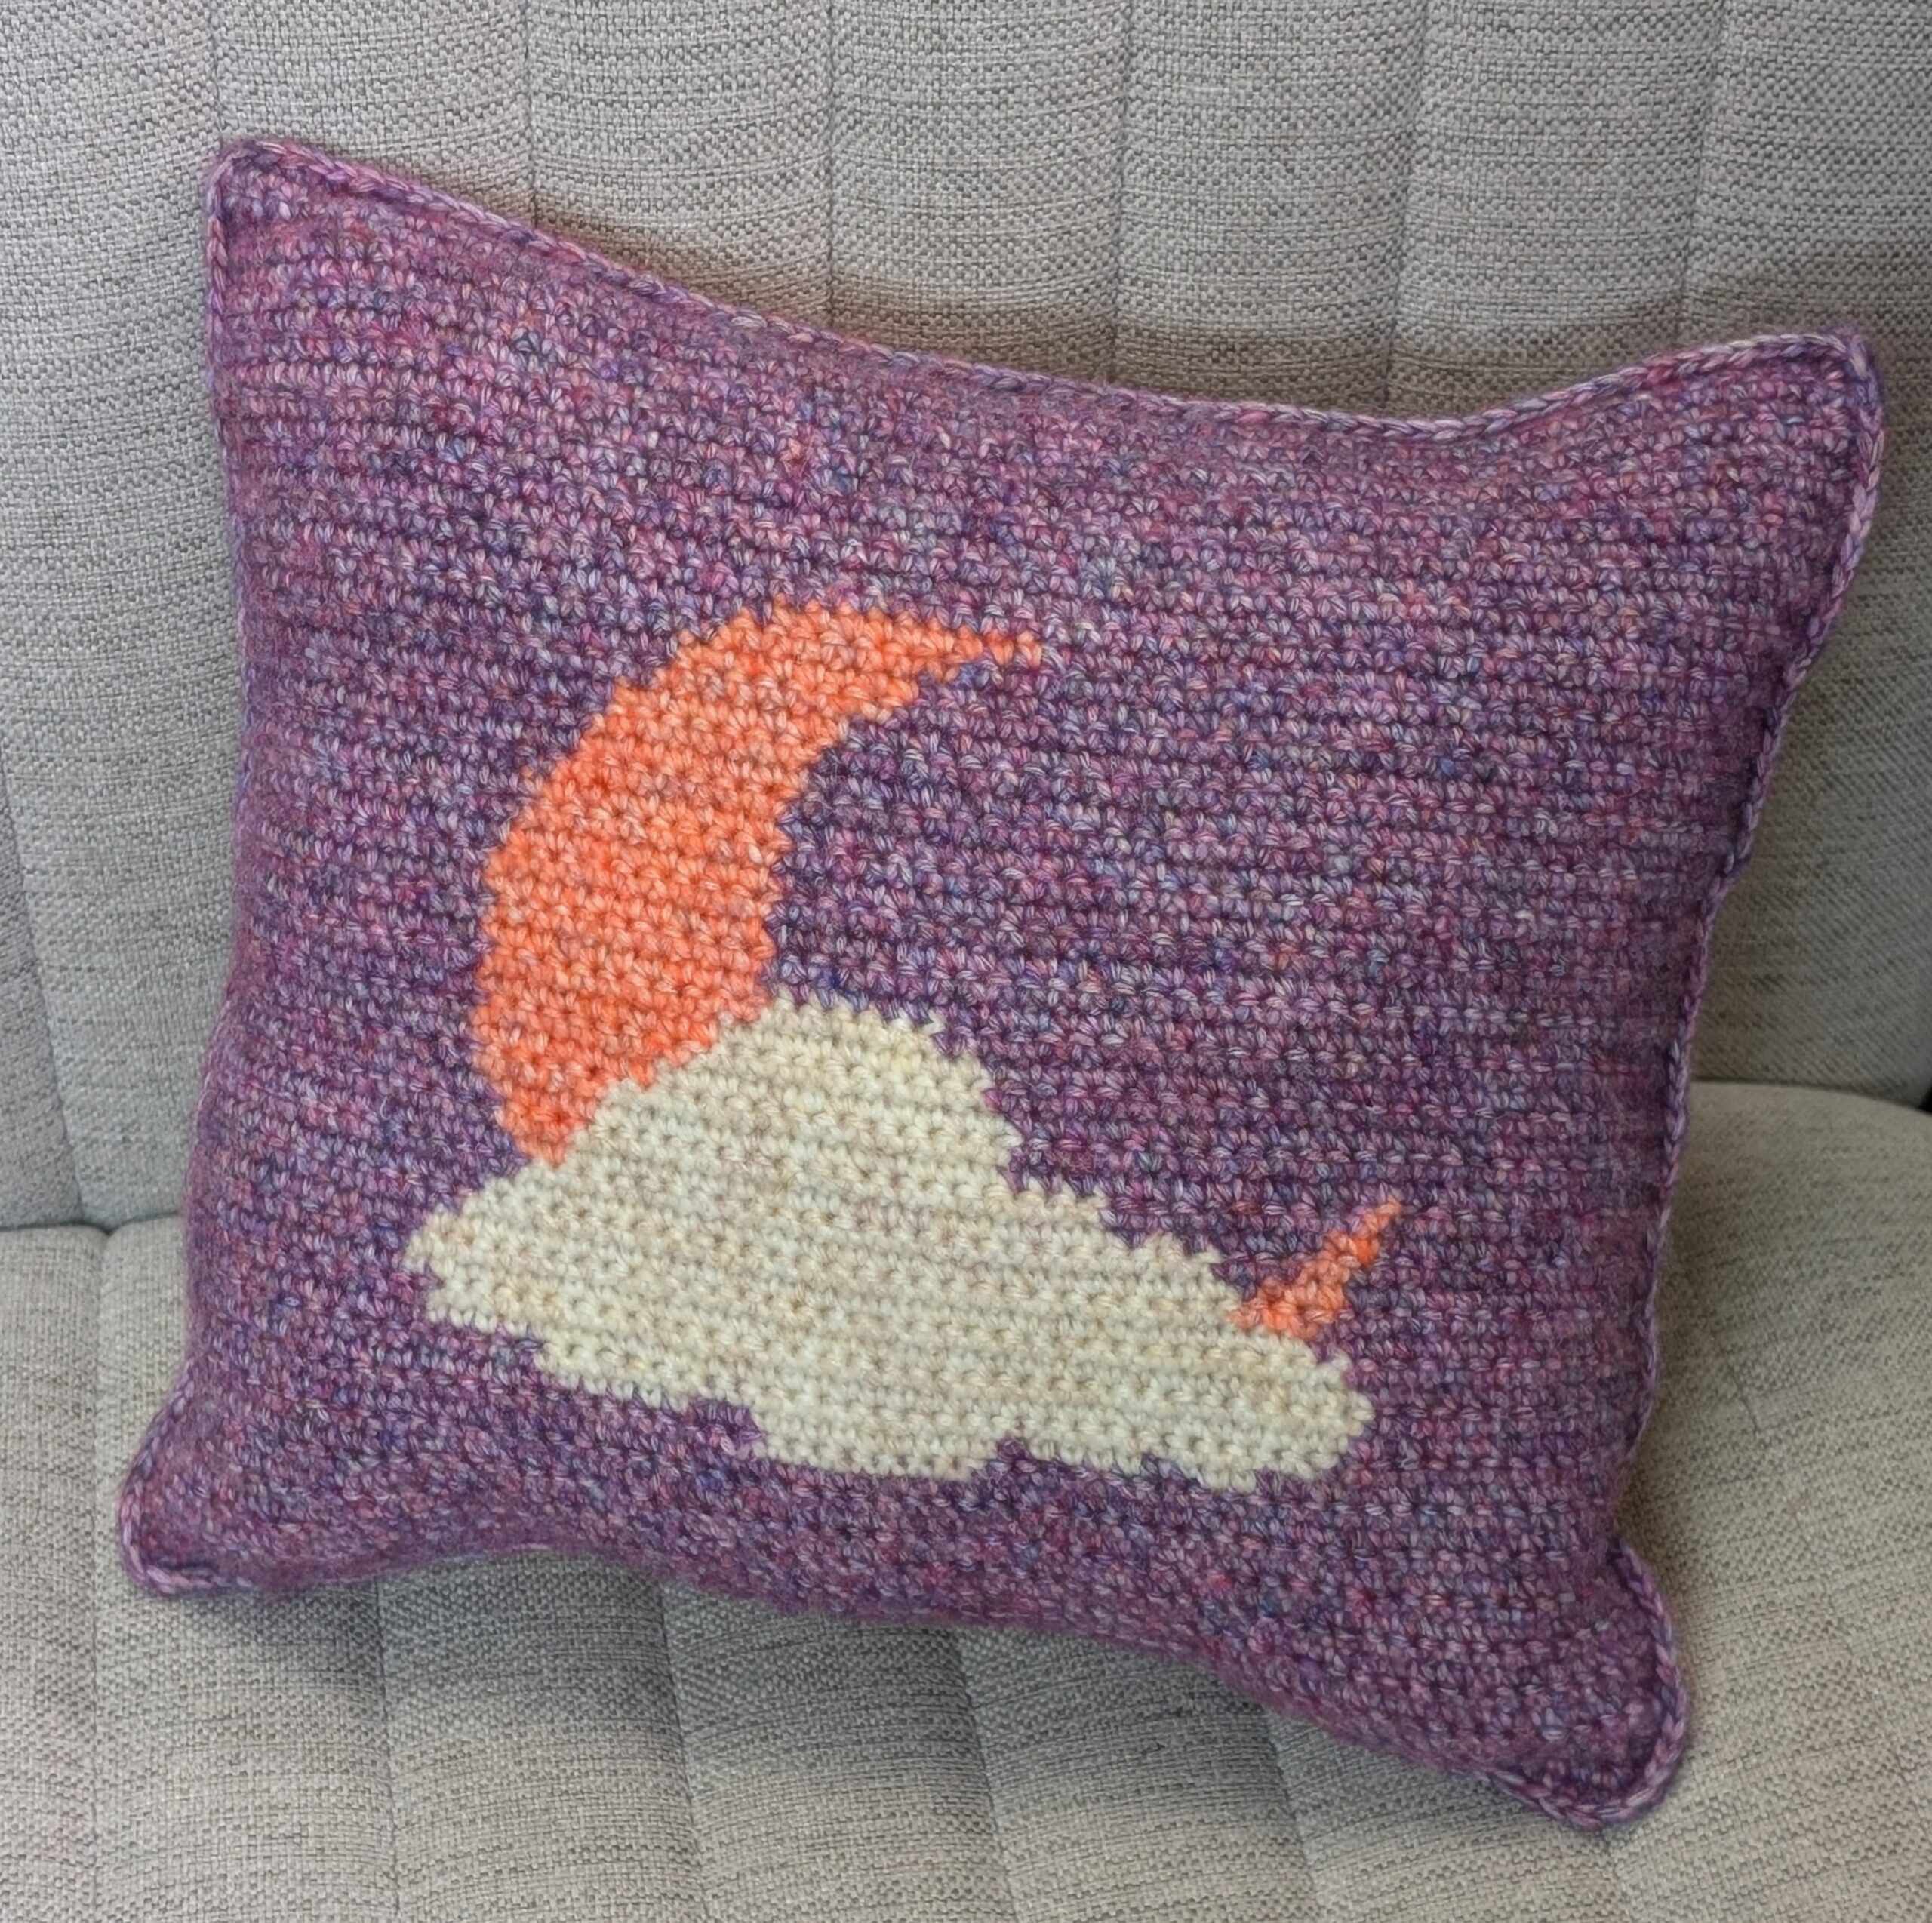
One of the best parts of this project is that you don’t have to weave in the ends! They get hidden inside of the pillow. You can also carry the yarn up the side for the back panel when you change colors, because it will always be on the same side. That allows you to just pick up the yarn you dropped a few rows down. Get creative with the colors you use for this pillow as well! I went with a Halloween colors, but you can do more realistic colors and still have that witchy vibe! You can also use the front panel as a wall hanging or bag instead! I would love to see your finished project. You can tag me (@leapingloops) on social media and/or add your project on Ravelry. 💜
MATERIALS
- KnitPal Cotton to the Core Worsted (Weight 4, 65% Cotton/ 35% Acrylic, 218 yards, 100 grams) or any weight 4 yarn
Example colors from Dusky Skies bundle: (You can purchase this bundle here!)
Color A: Grape Purple (190 yds)
Color B: Pearl White (30 yds)
Color C: Fresh Peach (150 yds)
- Hook US G / 4.0 mm
- Poly-fil
- Scissors
- Yarn Needle
GAUGE
- 20 single crochet stitches x 22 rows = 4”
SIZE
- Unblocked panel 12″ wide x 10″ tall
PATTERN KEY (US TERMS)
ch: chain, st(s): stitch(es), sc: single crochet, sl st: slip stitch, RS: right side, WS: wrong side
EXPERIENCE LEVEL
- Intermediate
NOTES
- Beginning chain 1 does NOT count as a stitch
- Pattern is worked from the bottom up
Front Panel


**After completing last st of panel, do not cut yarn. Continue to border.
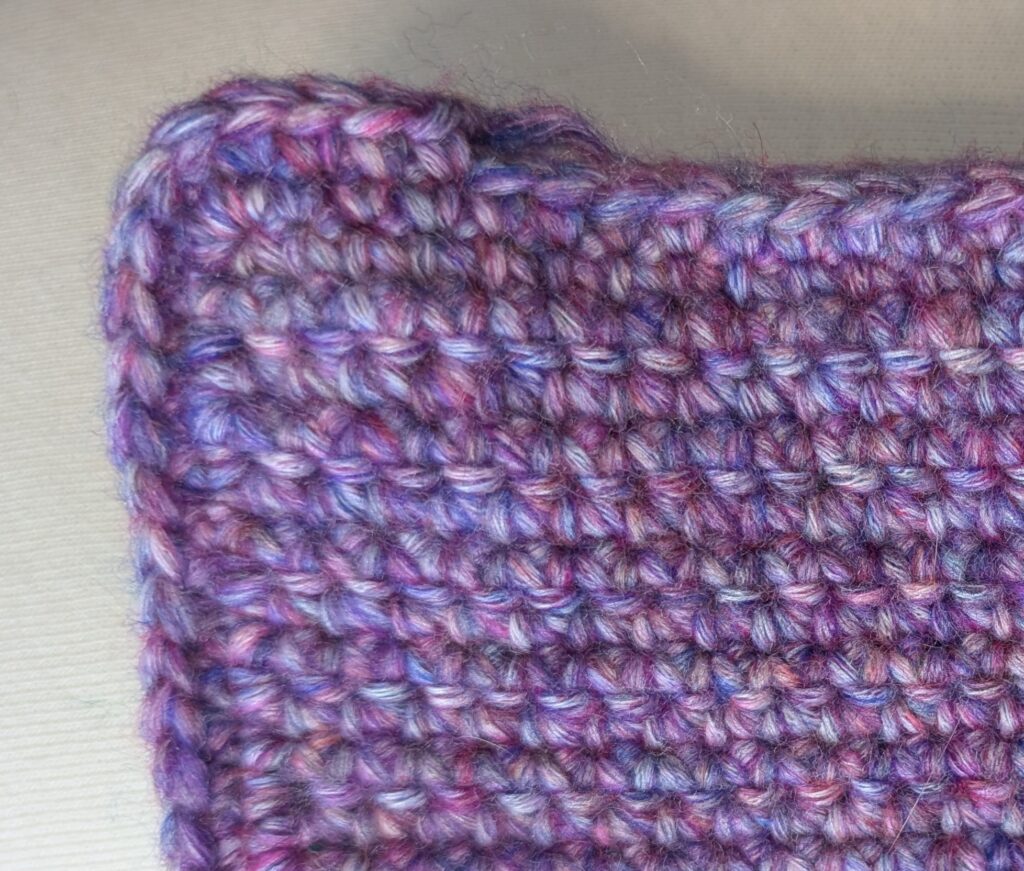
Border
Ch 1, turn, work a sc into each stitch along the edge of the panel. When you reach a corner, work 3 sc into that stich. Repeat this all the way around the panel. Join to first sc with a sl st. Fasten off.
Back Panel
Using Color C
Ch 61
Row 1 (RS): Sc into the second ch from the hook, sc across. -60 sc
Row 2 (WS): Ch 1, turn, sc into same st, sc across. -60 sc
Rows 3-12: Repeat Row 2. -60 sc
Attach Color A
Row 13-14: Ch 1, turn, sc into same st, sc across. -60 sc
Attach Color C
Rows 15-22: Ch 1, turn, sc into same st, sc across. -60 sc
Attach Color A
Rows 23-24: Ch 1, turn, sc into same st, sc across. –60 sc
Attach Color C
Rows 25-36: Ch 1, turn, sc into same st, sc across. -60 sc
Attach Color A
Rows 37-38: Ch 1, turn, sc into same st, sc across. -60 sc
Attach Color C
Rows 39-46: Ch 1, turn, sc into same st, sc across. -60 sc
Attach Color A
Rows 47-48: Ch 1, turn, sc into same st, sc across. -60 sc
Attach Color C
Rows 49-60: Ch 1, turn, sc into same st, sc across. -60 sc
Border
Attach Color A
Ch 1, turn, work a sc into each stitch along the edge of the panel. When you reach a corner, work 3 sc into that stich. Repeat this all the way around the panel. Join to first sc with a sl st.
Fasten off. If desired, block both panels.
Seaming Panels Together & Stuffing
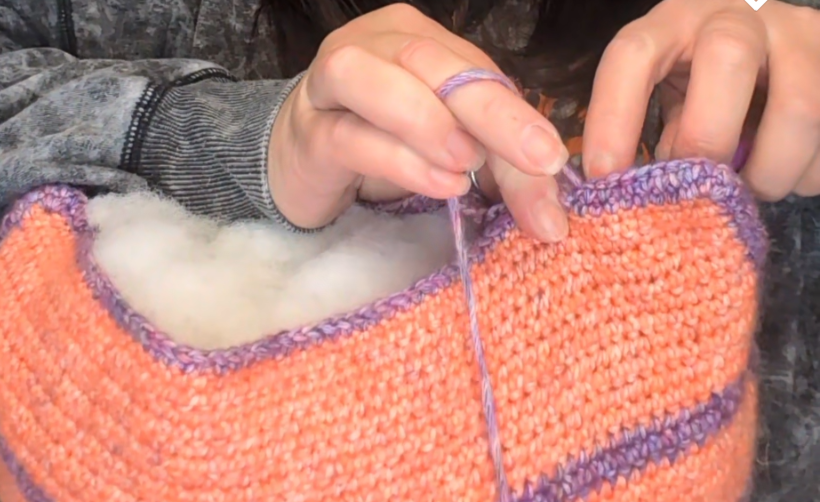
Hold both panels together with the wrong sides touching and the right sides facing out. You can connect the corners with stitch markers to make it easier. Turn the pillow upside down, attach Color A with a sl st to the bottom of pillow (through both panels) a few sts away from the left corner. (see photo)
Working through both loops of both panels, sc in every st around until you reach a few sts after the bottom right corner (do not cut yarn). This will allow the bottom of the pillow to have an opening to fill it with Poly-fil. Fill pillow with Poly-fil to your desired amount. After filling pillow, finish the scs across the bottom until you reach the first sc, sl st to close. Fasten off and weave in ends.